Ideas for shooting Nature Next Door

In the shadow of a global pandemic, there are many things we can’t do. Always the optimist, I ask: what’s still possible?
With my camera equipment staring me down and another gorgeous North Carolina spring pouring through my window, an idea sparked: what about using this time to capture nature next door? Everything here has been shot since the US pandemic measures began in late March, which in local terms, is week 5 of the lockdown.
Here are my ideas for building your nature portfolio in a way that’s socially-aware, in keeping with current COVID-19 guidance to stay safe and away from others:
- Take inventory; when it comes to nature, what are your nearby options and preferences?
- Think flowers;
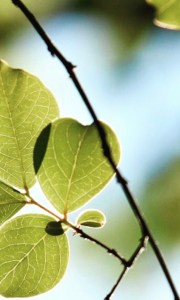
- Thinks leaves in sunlight;
- Think birds;
- Think rain (especially after it rains, if the sun emerges);
- Think combinations of the above (extra credit);
- Grab a long lens, I like to say 100mm or longer, for the best bokeh;
- Consider a tripod, especially for isolated but highly mobile subjects like birds; personally I find tripods a burden, but the difference in sharpness is visible;
- Set aside a full 60 minutes; my days are blurring together so waiting for free time may defer your creative pursuits;
- Be opportunistic – the best shot may not be the one you’d planned;
- Go more than once – 2-3x per week? – using takeaways from the prior shoot on the next one;
- Stay in public spaces – street, curb or sidewalk – and be sure to choose subjects and views that stay within public space; legal guides for photographers say as soon as you point your camera toward somebodies yard or house, they could claim privacy issues – and nobody wants negative energy;
- If you’re determined to take a picture of a beautiful dogwood or azalea in someone’s front yard, just ask them – they’ll probably say yes, especially if you offer to send them the JPG
- Get your images clean in camera, fewer edits saves time and brings peace of mind
And of course, the COVID-19 overlay:
- Travel alone
- Honor 6-ft social distancing at all costs; there are lots of joggers and dog-walkers out there!
- Mask-up, it’s the right thing to do (but the colorful biker or ski versions are more fun)
- Say hello, and ask folks how they are – it goes a long way
Share some of your ideas and progress. Let me know what’s working! And watch for more images here, on Instagram and Pinterest. Be well, and stay safe.


Grosbeak (c) 2020
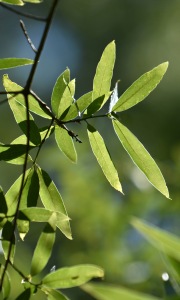
Willow Oak (c) 2020

Flox (c) 2020

Red maple with shadows, off season (c) 2020

Red maple (c) 2020
The Secrets of Natural Bokeh

Mountain grass (c) 2016 AMG
Everyone loves photos with a blurred background. The technique, called bokeh (BO’-keh), is derived from the Japanese word for ‘blur’ or ‘haze’.
Pros use it to enhance and focus their images.
But with some planning and insight, anyone can bring more bokeh into their photography.
Here are some things to try:
- Choose a telephoto, the fastest you have (e.g. f/2, f/2.8)
- Let in plenty of light, by shooting with your lens open wide (e.g., f/2, f/2.8); this is easiest to control using “Manual” (M) or “Aperture Priority” (A)
- Choose a background that’s more solid than not, and far away from your subject
- Get reasonably close to your subject, but far enough away that you can still zoom in/out to compose your shot. If you can’t move the subject, move yourself (e.g., change shoot positions, angles)
- Zoom in as much as possible (e.g., focal length > 100mm)
- These adjustments will have you moving in zig-zags at first; eventually you’ll know where to be
- Beware of ‘noisy’ or ‘bad’ bokeh – if your blurred background is cluttered, it can fight with your subject instead of framing it, which is definitely an issue with nature’s leaves and branches
- Watch for ways to catch points of light or ‘specular’ reflections in your background, which turn into eye-catching “bokeh balls”
That’s a lot of factors. You don’t need to use them all. But the more of these techniques you know about, the more ways you’ll have to produce bokeh when you shoot.
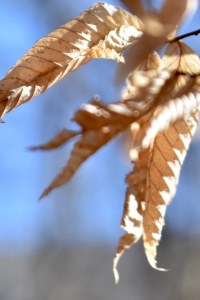
Marcescence of Beech, aka bokeh in nature (c) 2020 AMG
What’s happening here? The above steps make your depth of field more shallow, literally, limiting what will be in focus. Ideally, for the best bokeh, this will only be your subject. This is precisely the opposite of what smartphones and wide-angle lenses do, which put as much into focus as possible.
In a pinch, you can use “Portrait” (P) mode to ask the camera or smartphone to help you de-focus around your subject in real-time. It’s a short-cut, but it’s a useful one.
My bokeh is often set in nature, so my subjects might be grass, leaves, flowers or birds. Ideal backgrounds? Often woods, fields, mountains, or open sky. Running water and beaches offer some nice options. I like to explore layers in my wooded or mountain shots, experimenting with what’s in focus. Bokeh can help me separate those layers.
In the end, it’s all about trying to isolate your subject.
Of course, in the end, good bokeh is in the eye of the beholder. Experiment with different combinations of these techniques, to see what works best for you .. and let me know where you take your bokeh!
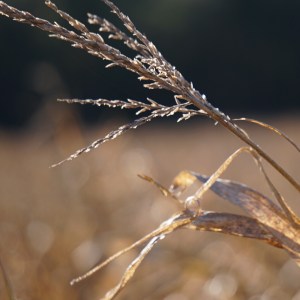
Autumn grass w/ bokeh balls (c) 2016 AMG
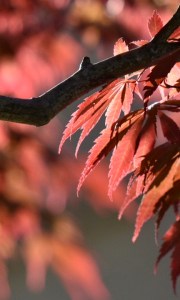
Red maples (c) 2020
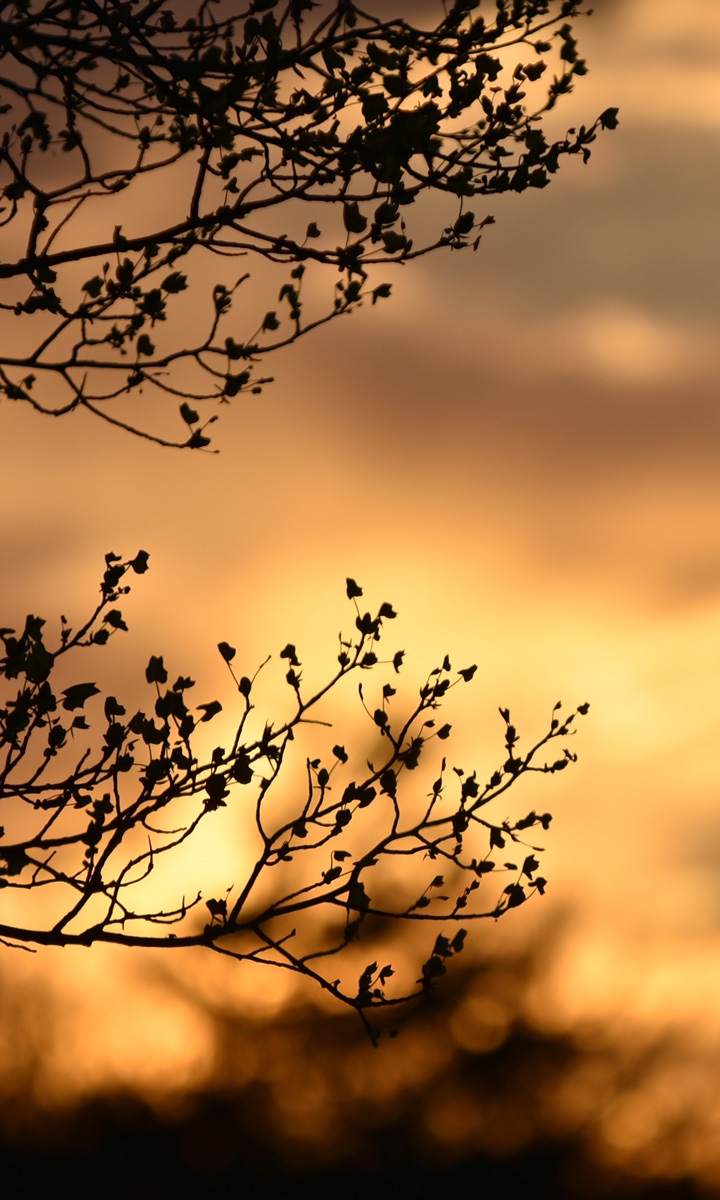
Among branches (c) 2020
North Carolina: Guaranteed Photo Ops

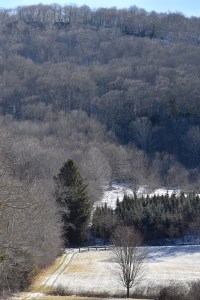
Sugar in Snow 2 (c) 2018 Amberwood Media

Parkway Colors (c) 2010 Amberwood Media
I’ve been shooting in North Carolina for over 20 years, and if there’s one thing I’ve learned .. there’s never a shortage of photo opportunities. Here’s a sampling from some of my favorite destinations statewide .. and there are many ..

Cherry blossoms in Charlotte (c) 2020

Linville Gorge from Wiseman’s Bluff, looking north, and down (c) 2004 Amberwood Media

Snow on Hemlock Branches in Avery County NC (c) 2019 Amberwood Media
Sugar Mountain, after a dusting of snow (c) 2020 Amberwood Media
Parkway Sunrise (c) 2020 AMG


You must be logged in to post a comment.